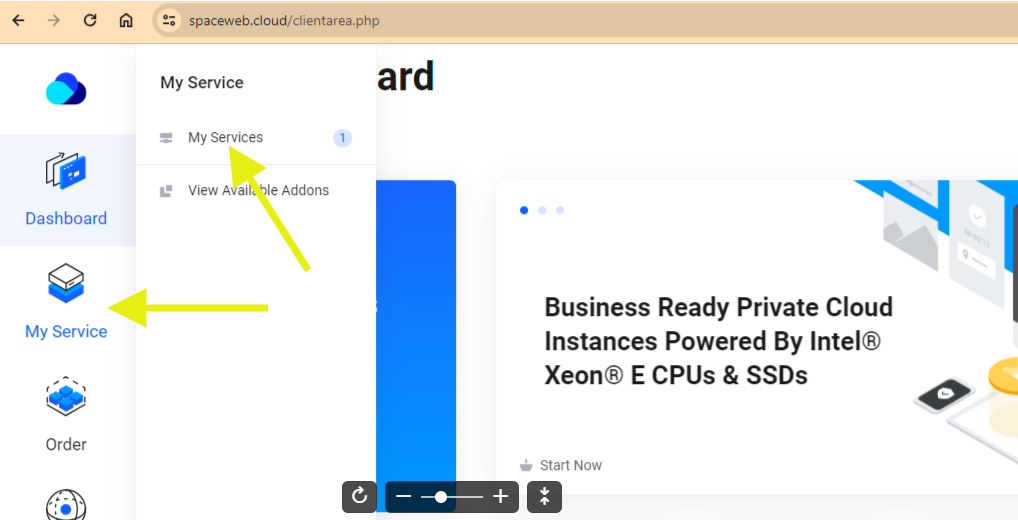
- Log in to your SpaceWeb account via https://spaceweb.cloud/login.
- After logging in, go to "My Services" and select the appropriate server from "My Products & Services."

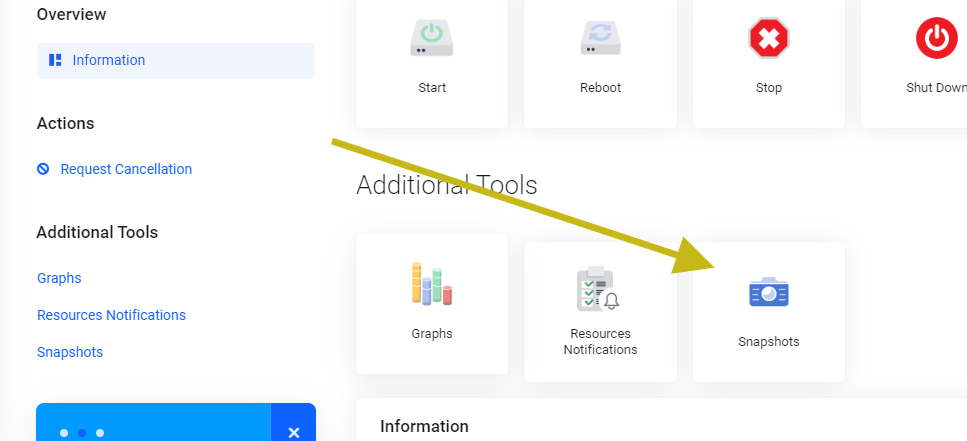
- Scroll down and find "Snapshots" under "Additional Tools."
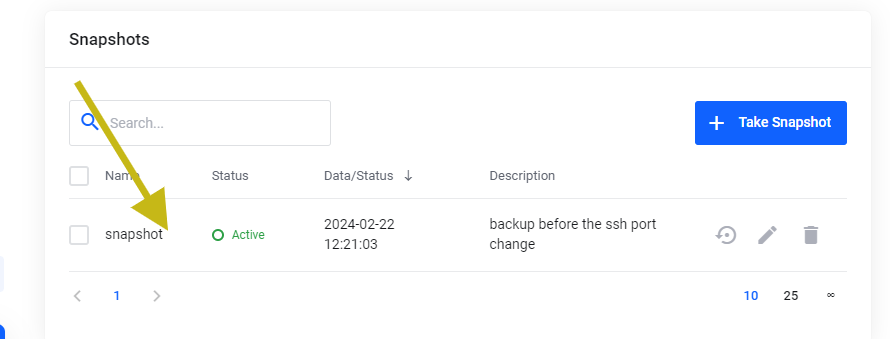
- Click on "Take a Snapshot" to create a snapshot. (Note: clicking "Create" will overwrite the existing snapshot)
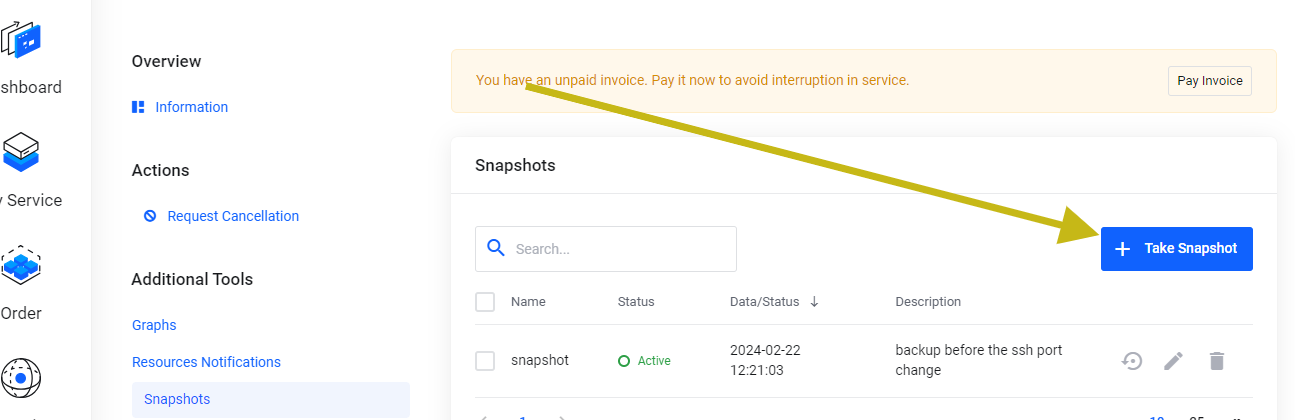
Ensure you provide a clear name and description for the snapshot to avoid confusion in the future. For example, if you're backing up before changing the SSH port on 22/02/2024, include details like "Snapshot on 22/02/2024 before SSH port change - Once the snapshot is created, it will be visible under the "Snapshots" section.
A snapshot is like taking a picture or making a copy of your computer or server at a specific point in time. Imagine you're working on a document, and you want to save a version of it just in case you make changes you later regret. A snapshot is similar but for your entire system.
When you take a snapshot of your computer or server, it captures everything - the operating system, applications, files, and settings - exactly as they are at that moment. This snapshot becomes a backup that you can use to restore your system to that exact state if something goes wrong later on.
IMPORTANTS OF SNAPSHOT
We highly recommend taking a snapshot whenever making changes to the server. This precaution allows for a quick and easy reversal to the working state in case anything goes wrong during the modification process.How to restore a snapshot
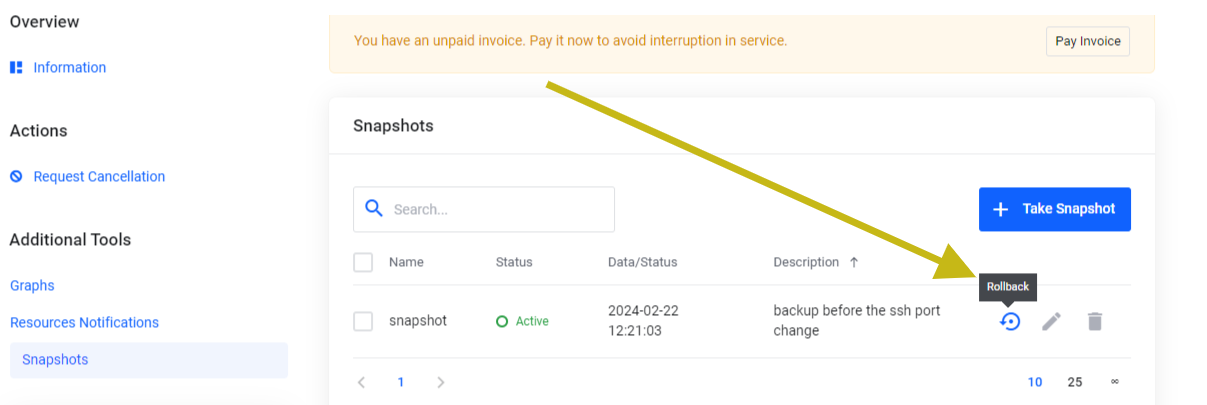
Restoring from a snapshot essentially means rolling back your system to a known, stable state, undoing any changes or issues that may have occurred since the snapshot was created. It's a valuable feature for recovering from unexpected problems or mistakes and ensuring the reliability and consistency of your computing environment.
You can use the option rollback to restore the server